
Autorize
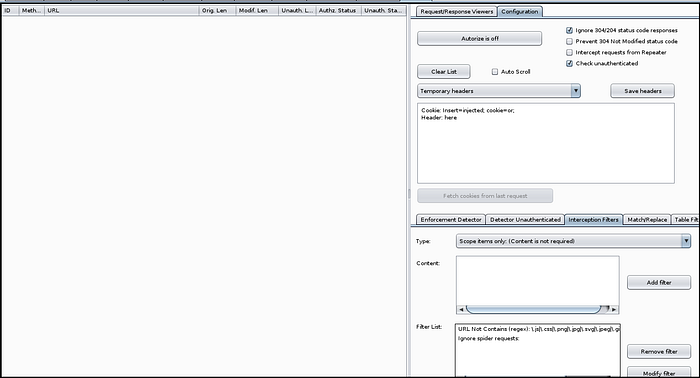
The Autorize tab should appear on the top row of tabs. Clicking on it will result in a display like the following:
In order for Autorize to send a second request as a lower privilege user we first need to load in the relevant session cookie into Autorize. When using Autorize you will want to have a browser window and a private browser window, both logged into the relevant web application you are testing. Log into one of the browser windows as a high privilege user and the other window as a low privilege user. To load the low privilege user cookies into Autorize you can use the “Fetch cookies from last request”.
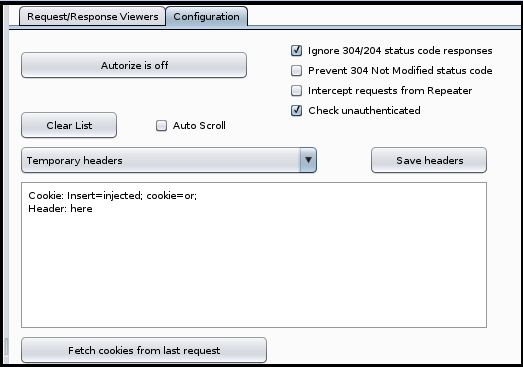
If you do this you want to make sure that the last request was from the low privilege user and not the high privilege user. One way to avoid this potential issue is instead turning Intercept on (under the Proxy tab) and refreshing or attempting an action within the low privilege user browser.
Now that you have the session cookies loaded, you need to tell Autorize what requests to intercept, and what is the standard behavior for the application when receiving an unauthorized request or request with insufficient permissions.
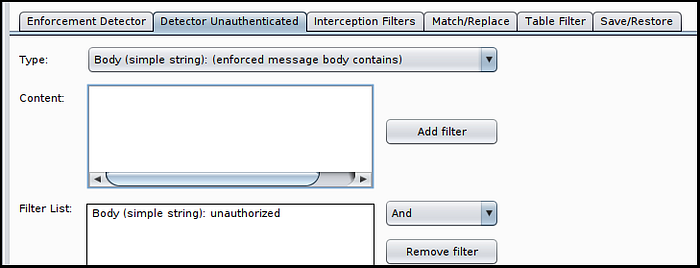
Starting with the Enforcement Detector, enter in some aspect of the application’s response that can be expected when a low privilege user attempts an action for which they do not have sufficient permissions for. In my experience, using the “Body (simple string): enforced message body contains)” type is the easiest to configure and works well, but Autorize supports many other options, as shown below. Select whichever type and content is relevant for you and then be sure to click the “Add filter” button.
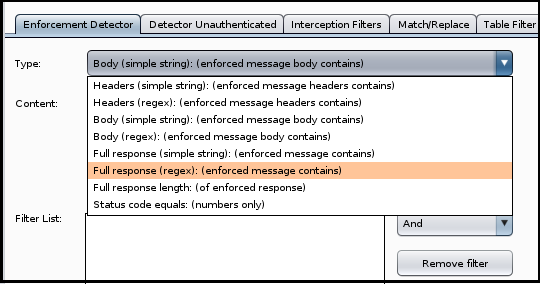
It is also important to note that it defaults to the “And” value when comparing multiple filters so in the event the application sends one type of error message for say, attempting to read a file, and a different error message for, attempting to access administrative functionality within the application; you’ll want to make a filter for each and change the “And” to “Or”.
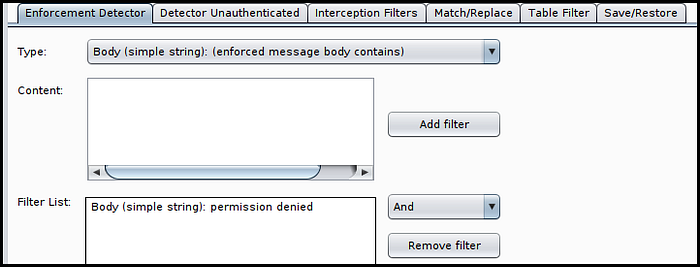
Repeat this same process for the Detector Unauthenticated, using the standard application behavior for unauthorized requests as your baseline.
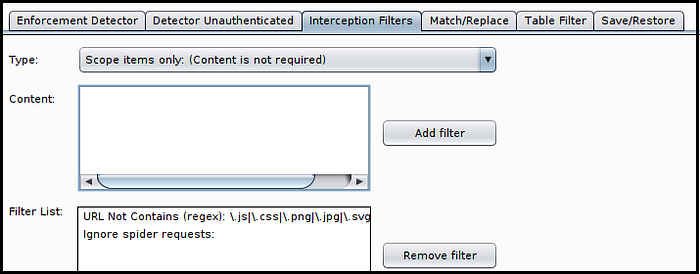
Click “Add filter” when this type is selected, as shown in the screenshot below.
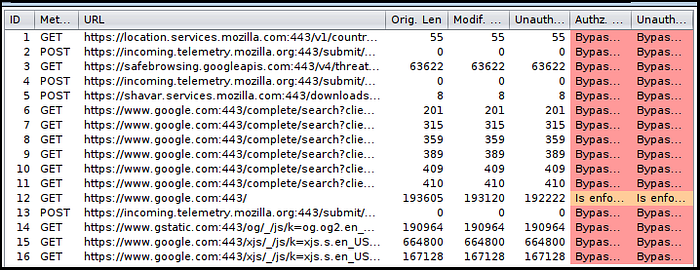
All that’s left is to click the “Autorize is off” button to turn it on and then start testing. Simply interact with the application as the high privilege user and each request will get sent a second time as the low privilege user and a third as an unauthenticated user.
Below is a screenshot of what the general output will look like, and the Request/Response Viewers (the tab to the left of the Configuration tab) is an easy way to view the differences between the application responses based on the user role level.
Last updated